


Disclaimer: This material is being kept online for historical purposes. Though accurate at the time of publication, it is no longer being updated. The page may contain broken links or outdated information, and parts may not function in current web browsers.
In this activity...
You get to create a stunning “stained glass” leaf. What better way to highlight the changing seasons than a beautifully translucent, fall-colored ornament? As beautiful as these fall colors are, they are actually an important indicator of changing climate as well. Scientists are especially interested with the timing of when leaves begin to change color.
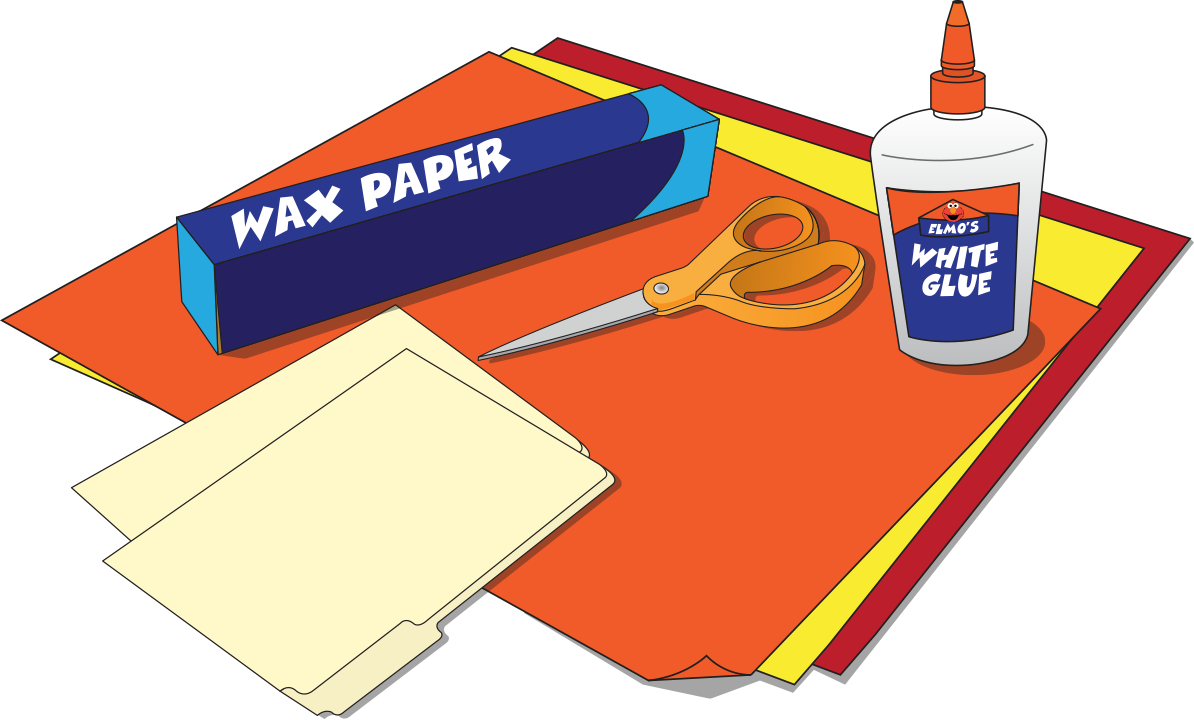
Materials List:
- Manila folder
- Roll of wax paper
- White glue
- Red, yellow, and orange tissue paper sheets
- A printed template of your choice
- Scissors
- A heavy book or box to use as a weight
Step 1: Download and print your template!
Pick a leaf, any leaf.


Step 2: Roll out and cut a roughly 20-inch long piece of wax paper.

Step 3: Tear tissue paper into small pieces and spread out pieces on your work surface.

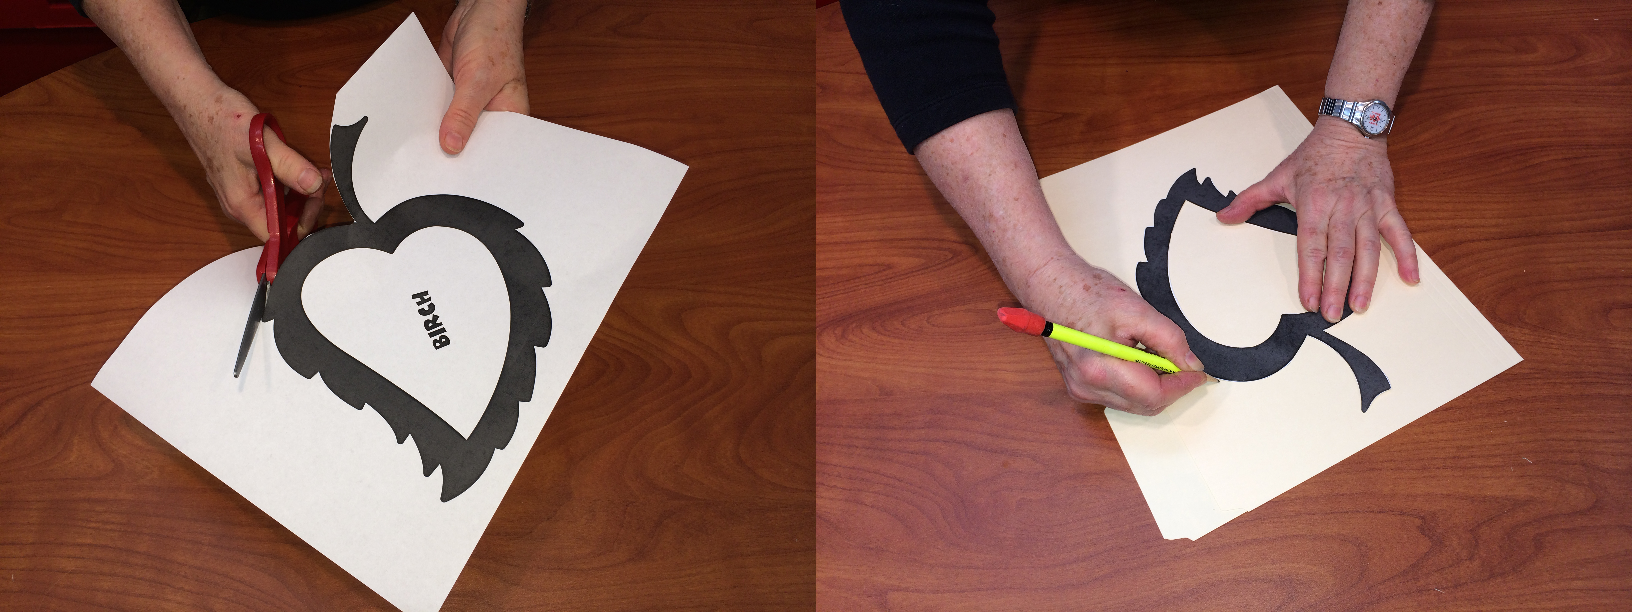
Step 4: Cut leaf template and trace onto a manila folder, then cut leaf outline on the manila folder. Cut both sides of folder so that you will have two outlines when finished.
Leave a bit of the folded edge of the folder until the end to make it easier to cut both sides.

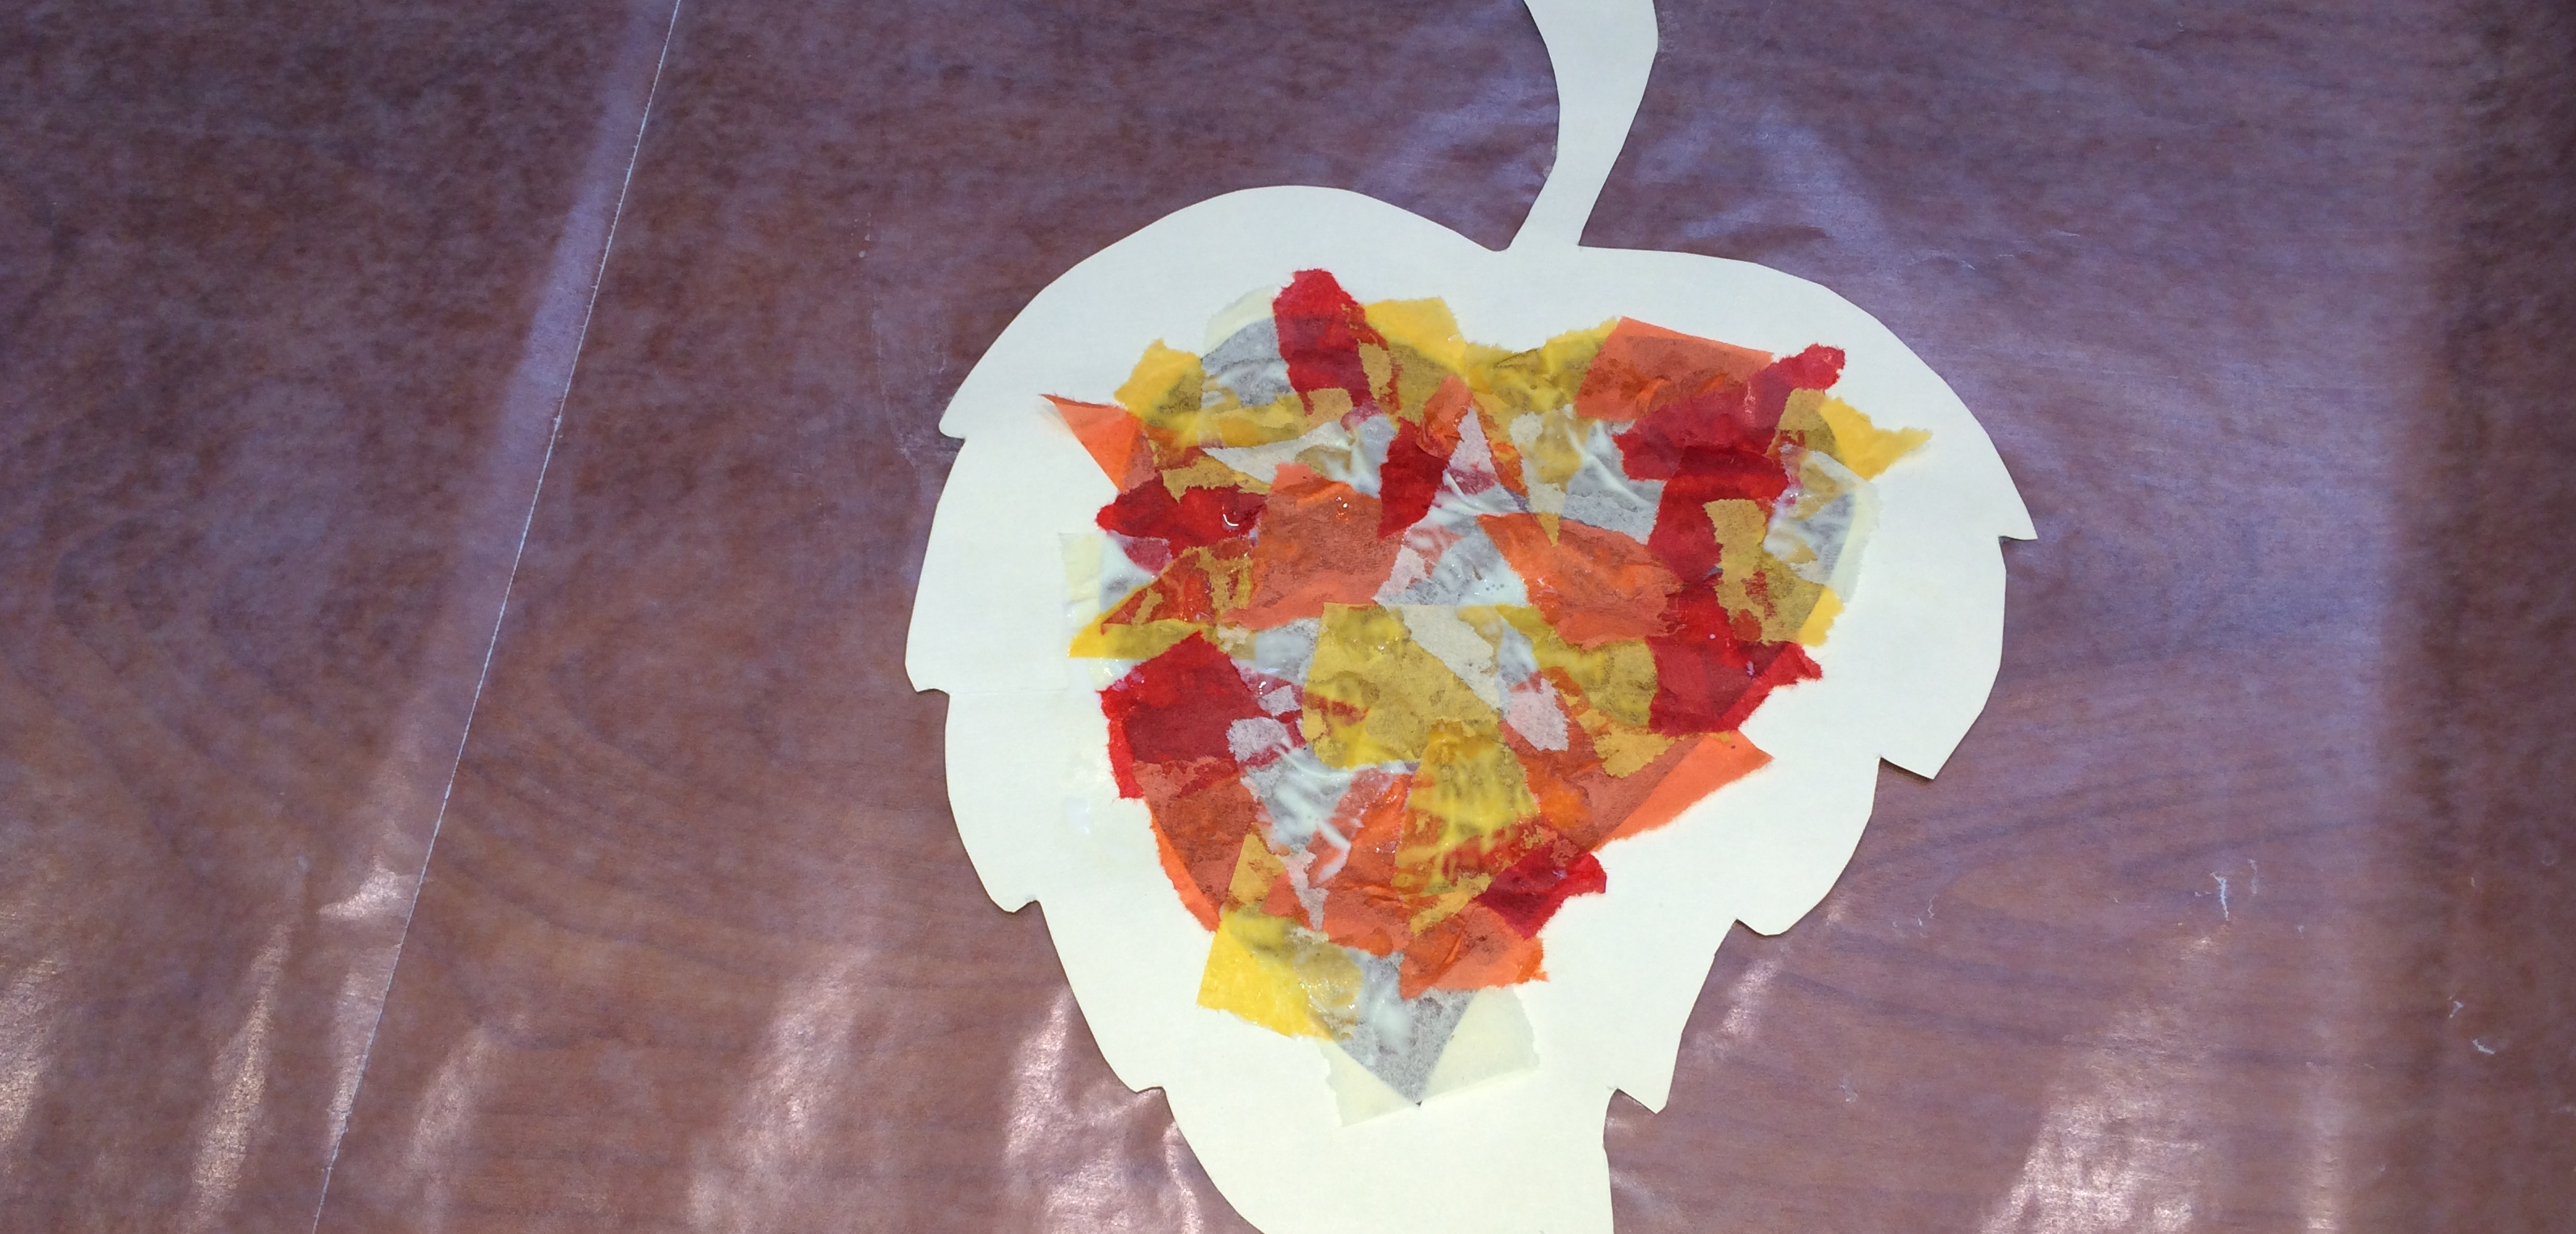
Step 5: Glue one of the leaf patterns to the wax paper and then dot the wax paper in between the pattern with glue.

Step 6: Cover the wax paper inside your pattern with your tissue bits. Use a mix of colors.
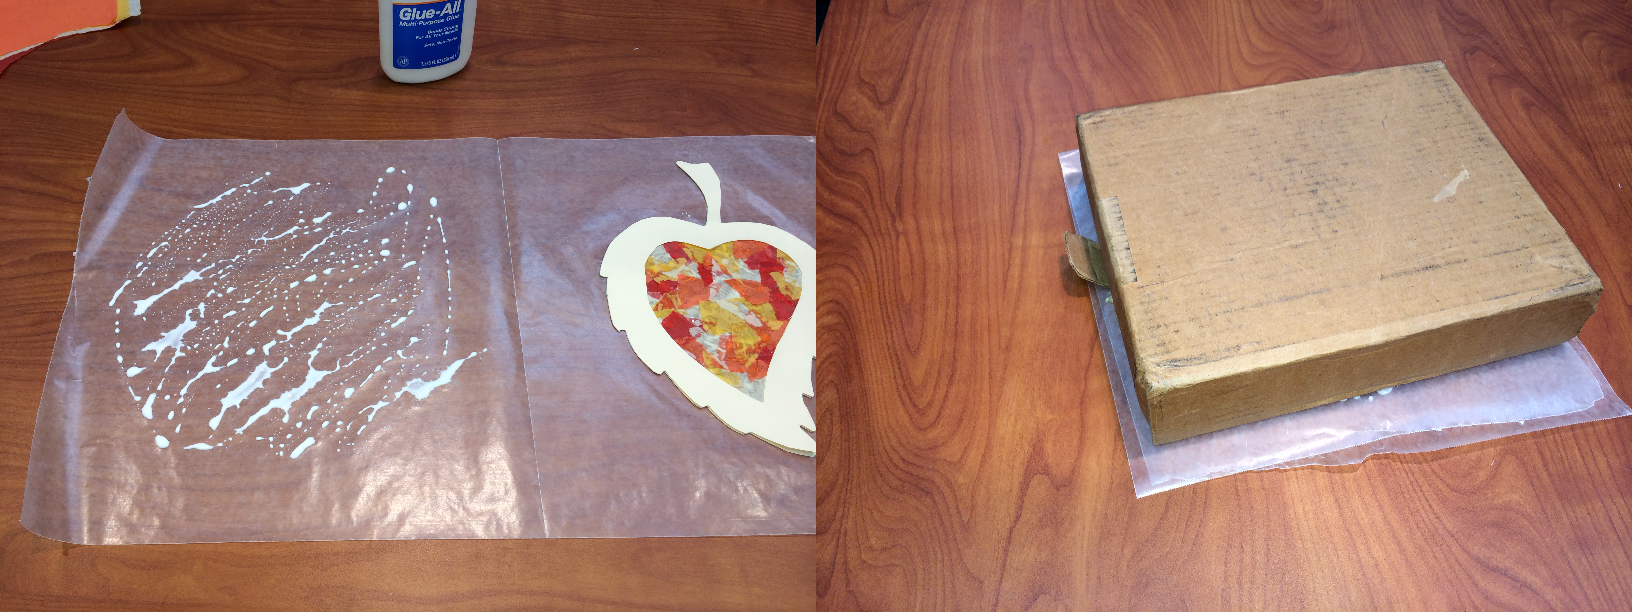
Step 7: Apply glue to the first pattern and place the second pattern on top of it. This will create a nice, clean border.

Step 8: Apply glue to the other half of the wax paper and then fold it onto the top of the leaf. Place a heavy book or box on top as a weight and let it dry overnight.
Step 9: Remove the weight and cut the excess wax paper around the border of the leaf pattern. Punch a hole and hang with yarn or string near light!


